
If you’re a beginning pottery maker, you may be wondering how you’re going to afford to buy yourself a kiln. However, until you start to get into complex pottery, you can actually just use your household oven to fire your pottery. Of course, you’ll need to use a certain type of clay, and follow a few instructions, but you can bake your clay pottery pieces at home in your existing oven. In this article, we’ll cover the tips, tricks, and some ideas about baking your pottery pieces in your very own kitchen.
In this article we will explore how you can use your regular household oven and also take a look at reasons as to why it is a good idea. Amongst other things we will dig into the following topics.
- Why it is a good idea to use polymer clay
- Do you really need a kiln to bake clay?
- What are the main benefits of using your household oven to pottery
- Inspiration – Make and bake these items in your oven at home
Table of Contents
Why Is It Good To Use Polymer Clay?
Polymer clay is incredibly easy to work with, comes in amazing colors, and doesn’t require any specialized skill to start working with it as a medium. It actually contains no clay at all, but is made of the same material that PVC is constructed from. However, it is great for pottery projects, especially for beginners. You can make beads, charms, mugs, sculptures, and almost any other pottery project that your heart desires out of polymer clay and then fire it right in your oven.
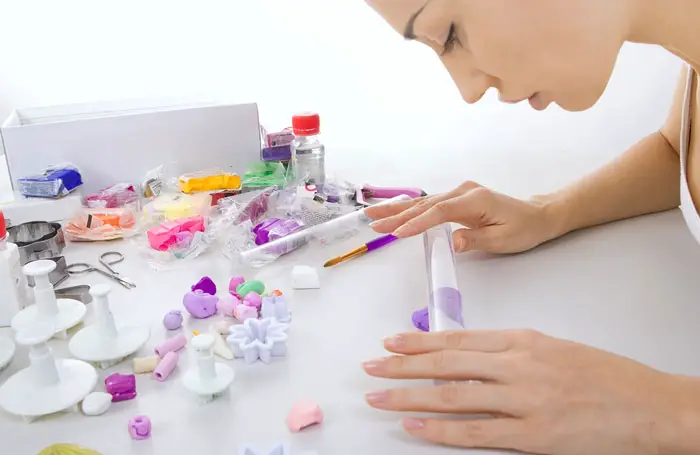
As you can see there are a lot of benefits in using polymer clay. Especially when you want to bake your clay in your own oven. Let us explore the actual benefits of baking in your household oven.
What Are The Benefits To Baking In The Oven?
Well, the first and most obvious of the benefits is the fact that you don’t need to invest thousands of dollars in an expensive kiln. The reason that you may not want to invest in a kiln when you are a beginning pottery maker is that if you end up not enjoying the hobby, you now have a machine on your hands that you no longer want, and that wasn’t cheap to begin with.
Instead of making the investment in your beginning days of pottery making, try polymer clay baking first and see if you really do enjoy the hobby. If you do, then you can certainly move on to kiln firing clay pieces. The polymer clay baking will be good practice for handling your pottery in terms of baking and prepping.
In addition, when you’re working with polymer clays, they are a lot cheaper than stoneware clay or earthenware clay. Also, they come in fun colors, and you can actually dry polymer clay in a toaster oven if you need to. The simplicity of working with polymer clay is a huge draw, especially to the weekend crafting crowd. Most people who are working with stoneware clay, pottery wheel, and kiln are doing so on a professional level. If you’re just starting to work with clay as a medium, you definitely want to make sure that you enjoy working with clay before you invest a great deal of money in the process.
Allow The Clay To Thoroughly Dry Out
Prior to putting the clay into your oven, it’s very important to verify that your piece has completely dried out. You don’t want any moisture whatsoever left in your piece of pottery when you start the firing process. The good thing about polymer clay is that it isn’t going to shrink at all when you put it in the oven to bake. It will retain the size that you made it, no matter how long you bake the piece.
Also, prior to putting any polymer clay into your oven, make sure that you open the windows in your home. You don’t want to fill your house with the fumes. However, as long as you don’t burn your clay, the fumes won’t be toxic. Still, they won’t smell great, either, so be sure to ventilate your home well prior to placing any of your clay pieces into the oven to bake.
How To Bake Your Clay In Your Oven
Once you have verified that your clay is dried out, and you’ve opened the windows in your home, go ahead and preheat your oven according to the directions on the clay package. This is usually going to be somewhere between 275F and 300F. The easiest way to set up your clay piece for baking is to start with aluminum baking pans, like the kind you use for large food service dishes. Place a ceramic tile, like a 3×3 piece of tile, inside of an aluminum baking pan. Then, place a piece of copy paper or parchment paper over the piece of ceramic tile. Finally, on top of the piece of paper, place the piece that you want to bake, then place a second aluminum baking pan over the first to close the entire setup.
You should end up baking your clay piece 30-45 minutes per 1/4 inch of thickness. However, at standard temperature baking, it isn’t going to burn, and it won’t hurt the piece to go a little longer, so don’t worry too much if your math isn’t exact. You want to be sure that your clay piece is completely baked, though, because once you realize it isn’t fully baked and that the clay is crumbly, it’s too late to fix it and you’ll have to start all over again.
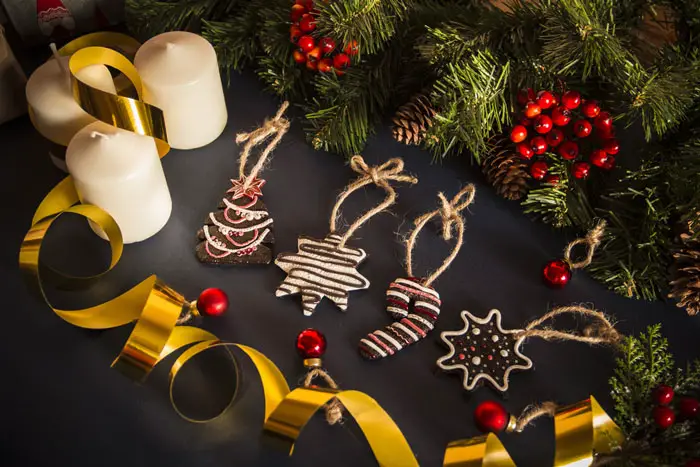
Some Ideas For Your Own Clay Projects
The possibilities for clay projects are virtually endless, but this is a brief list just to get you started on your very own projects that you can make out of polymer clay and bake in your oven at home.
- Clay earrings
- Ornaments for your Christmas tree like snowflakes, snowmen and much more
- Flowers and vines
- Letters for necklaces in clay
- Clay coasters and spoon rests
Make Clay Earrings
You can make button style earrings by crafting little flowers, animals, or symbols out of clay. You then affix them to a stud earring post and have adorable button earrings in any shape or style that you wish. In addition, you can make drop style earrings, where the clay would be affixed to a chain that hangs on a hook style earring. This would make amazing dangling shapes or figures, and you can make them as long or as short as you decide.
Ornaments For The Christmas Tree
The type of ornaments that you can make is absolutely up to you. You can make ornaments for a Christmas tree, ornaments to hang on a wreath, ornaments to hang from a rear view mirror, basically anywhere that you want to hang them. Anything from snowflakes, to snowmen, to reindeer, to tiny Santas to hang 0n a wreath are completely adorable and fun to make.
Flowers and Vines For Picture Frames
Making tiny flowers and vines, no matter what type of flower you like best, add personal and decorative touches to picture frames. You can make it as small or as intricate as you desire, but it really jazzes up the typical picture frame, and gives it a personal touch.
Flowers, Vines, Shapes, Animals For Barrettes
Hair barrettes and hair clips are always a fun accessory, and they look great with personal touches added to them. You could make flowers, stars, ladybugs, kittens, anything that you or a loved one would enjoy, and then affix them to hair barrettes and hair clips. In addition, You could make clay letters, and spell out the person’s name on their barrette or hair clip for the extra personal touch.
Clay Letters For Necklaces
In addition to putting someones name on a barrette, you could make clay letters that can be strung on jewelry, and make personalized necklaces and bracelets. You can also make the spacer beads to offset the letters for a fully customized piece of jewelry.
Coasters And Spoon Rests
Not everyone can make the pretty and tiny flowers for hair bows, or form a frog family from clay at the drop of a hat. However, you could make coasters or spoon rests if you’re not the best at forming a specific shape or design. The coasters and spoon rests are simple, not time-consuming, and they’re useful items.
Just To Recap What We Have Learned
You can bake your clay pottery pieces at home in your existing oven. Polymer clay is incredibly easy to work with, comes in amazing colors, and doesn’t require any specialized skill to start working with it as a medium. Instead of making the investment in your beginning days of pottery making, try polymer clay baking first and see if you really do enjoy the hobby. If you do, then you can certainly move on to kiln firing clay pieces. The polymer clay baking will be good practice for handling your pottery in terms of baking and prepping.
In addition, when you’re working with polymer clays, they are a lot cheaper than stoneware clay or earthenware clay. Also, they come in fun colors, and you can actually dry polymer clay in a toaster oven if you need to. Prior to putting the clay into your oven, it’s very important to verify that your piece has completely dried out. You don’t want any moisture whatsoever left in your piece of pottery when you start the firing process. Once you have verified that your clay is dried out, and you’ve opened the windows in your home, go ahead and preheat your oven according to the directions on the clay package. This is usually going to be somewhere between 275F and 300F. You should end up baking your clay piece 30-45 minutes per 1/4 inch of thickness. However, at standard temperature baking, it isn’t going to burn, and it won’t hurt the piece to go a little longer
