For paper mache artists varnish is a useful product as the added layer of protection can mean the difference between a piece that lasts for weeks or one that starts to show signs of wear and tear after only a few days.
With that said, there are a few things to keep in mind when selecting a varnish for paper mache.
First, you’ll want to make sure that the product you choose is safe for use on paper and other delicate materials.
Many general purpose varnishes contain chemicals that can be harmful to paper mache, so it’s important to read the labels carefully.
Second, you’ll need to decide whether you want a water based or oil based varnish. Water based varnishes are generally easier to work with
Varnish is a type of sealant that is applied to the surface of a work in order to protect it from scratches, dust, and fading. It can also enhance the appearance of the work by making its colors more vibrant or glossy.
There are many different types of varnish available on the market, each with its own set of pros and cons. In this article, we will take a look at some of the most popular varieties and discuss when it is best to use them.
Water based varnishes are generally easier to work with and will not yellow over time like oil based varnishes can. They are also more forgiving if you make a mistake while applying them.
Oil based varnishes, on the other hand, tend to be more durable and provide a higher level of protection against the elements. They can be more difficult to work with, however, and require special solvents for cleanup.
Table of Contents
What is varnish and what are its uses?
Varnish is a type of paint that is used to protect wood from getting damaged. It can also be used to give furniture and other wooden objects a shiny finish.
Varnish comes in different colors, and there are both glossy and matte finishes available.
There are two main types of varnish: oil-based and water-based. Oil-based varnish is more durable than water-based varnish, but it is also more difficult to apply.
Water-based varnish is easier to apply, but it doesn’t last as long as oil-based varnish.
Varnish can also be used on metal surfaces, such as iron or steel. In this case, it forms a protective coating that prevents the metal from rusting.
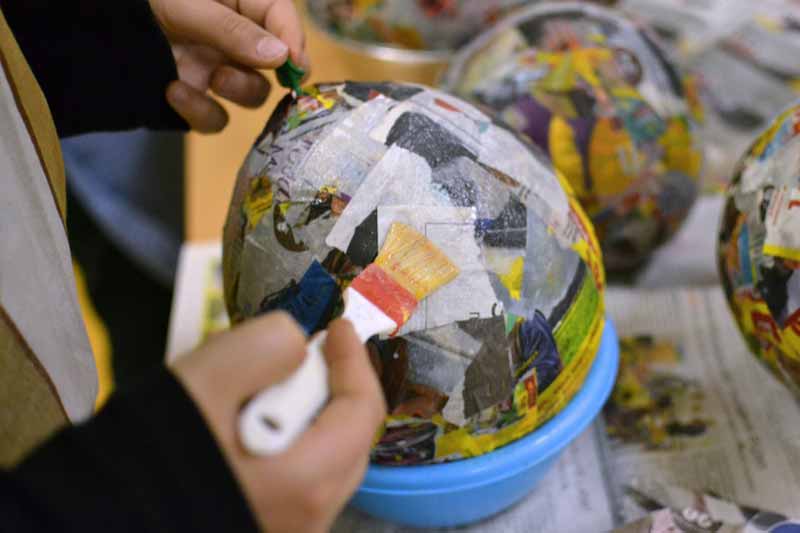
How to varnish paper mache
When it comes to art, there are a million different ways to create something beautiful. One of the most popular methods is paper mache.
This process uses paper strips that are dipped in glue and then applied to an object or surface.
Once it dries, the paper becomes sturdy and can be painted or decorated in any way you choose.
If you’re interested in trying your hand at paper mache, but don’t know where to start, we will teach you everything you need to know.
We’ll cover the basics of how to varnish paper mache so that it’s strong and durable, and we’ll also give you some tips on how to make your project look its best.
When it comes to varnishing paper mache, there are a few different options that you can choose from. You can either use a spray-on varnish or a brush-on varnish.
Spray-on varnishes are usually easier to apply and will give your project a more even coat. However, they can be more expensive than brush-on varnishes.
Brush-on varnishes require a little more time and effort to apply, but they’re often more budget-friendly. Whichever type of varnish you choose, make sure that it’s specifically designed for paper mache.
Once you’ve selected your varnish, you’ll need to prep your work surface. Cover it with a drop cloth or an old sheet to protect it from spills.
Next, set up a ventilation system. This is important because varnish can be smelly and you don’t want to breathe in too much of the fumes.
You can do this by opening windows and doors or using a fan to circulate the air. If you’re working on a large project, you may want to consider doing this step outdoors.
Once your work area is prepped, you’re ready to start varnishing your paper mache. If you’re using a brush-on varnish, apply it to your project in long, even strokes.
Be sure to cover all of the paper strips, including any that are tucked into crevices or corners.
If you’re using a spray-on varnish, hold the can about 6 inches away from your project and apply a light, even coat.
Let the first coat of varnish dry completely before applying a second coat. This will help to ensure that your paper mache is strong and durable.
Once you’ve applied two coats of varnish, your project is complete! Let it dry completely before displaying it or giving it away.
Now that you know how to varnish paper mache, you’re ready to create something beautiful.
Be sure to experiment with different colors and finishes to give your project its own unique look.
The different types of varnish available
There are different types of varnish available in the market and each type has its own unique features. We will explore the different types of varnish and their uses.
There are three main types of varnish- oil based, water based and solvent based. Each type has its own advantages and disadvantages.
- Oil Based Varnish: Oil based varnish is made up of natural oils such as linseed oil, tung oil or walnut oil. It is slow drying and gives a high quality finish but it is also expensive.
- Water Based Varnish: Water based varnish dries quickly and is less likely to cause problems with yellowing over time but it doesn’t give a very durable finish.
- Solvent Based Varnish: Solvent based varnishes are the most common type- they are easy to apply, dry quickly and give a good finish. However, they can be harmful to your health if used incorrectly.
Now that we have explored the different types of varnish, let’s take a look at their uses.
Uses of Varnish: Varnish can be used for both indoor and outdoor projects. It is commonly used on woodwork, such as doors, windows, skirting boards and furniture. It can also be used on metalwork and masonry.
Varnish is available in a range of finishes, from high gloss to satin. The type of finish you choose will depend on the project you are working on and your personal preference.
How to apply varnish to your paper mache project
Applying varnish is a finishing step that can be used to protect your paper mache project from moisture and dust.
It will also give your project a shine and make it look more polished. Varnish is available at most arts and crafts stores, and there are several types available.
You will want to choose the type of varnish that is best suited for your project’s needs.
Acrylic varnish is water-based and dries quickly. It is not as durable as the other two types, but it does have a nice finish.
Polyurethane varnish is oil-based and takes longer to dry, but it is very durable.
Shellac varnish is also oil-based, but it dries very quickly and has a high gloss finish.
Which type you choose will depend on the project you are working on and how much protection you need.
For example, if you are making a toy that will be played with by children, you will want to use a more durable type of varnish like polyurethane or shellac.
If you are just looking to add a little shine to your project, then acrylic varnish will be fine.
To apply the varnish, start by stirring it well so that all of the particles are evenly mixed.
Then, using a clean, dry brush, apply a thin layer of varnish to your project.
Be sure to work in one direction and avoid going back over areas that you have already covered.
Allow the first layer of varnish to dry completely before applying additional coats.
You can usually find directions on the back of the varnish container about how long it will take for each type to dry.
After the final coat has dried, you can buff it with a soft cloth to create a shine.
Now your project is protected and looking great.
Tips for getting a smooth even paper mache finish with your varnish
When you’re working with paper mache, one of the finishing steps is to apply a coat of varnish. This will give your project a nice, smooth finish. But how do you get that smooth finish? Here are some tips to help you out.
- Make sure your surface is clean and dry before starting. Any dust or dirt on the surface will show up in the finished product.
- Apply a thin coat of varnish first. You don’t want it to be too thick, or it will start to peel off as it dries. A thin coat will give you a nice, even finish.
- Allow each coat of varnish to dry completely before applying the next one. This may take several hours, so be patient!
- If you notice any bumps or lumps in the finished product, sand them down gently with fine-grit sandpaper until they’re smooth.
- Be careful not to sand through the paper mache layer into the cardboard or wood below.
With these tips, you’ll be able to get a smooth, even finish on your paper mache projects. Just be patient and take your time, and you’ll end up with a beautiful result.
