When you’re done with your paper mache project, you need to dry it so it doesn’t warp. But if you don’t have a lot of space, or if the weather isn’t cooperating, how can you make sure your project dries properly?
There are a few ways to dry paper mache. One way is to use a hair dryer. Another way is to put it in the sun. Yet another way is to use a fan. Whichever way you choose, make sure the paper mache is completely dry before you paint it or decorate it in any way.
In this article we are going to explore further how to dry paper mache and what you could do to make it dry faster.
Table of Contents
How to make paper mache dry fast
One way to make paper mache dry fast is to use a hair dryer. Another way is to put it in the oven on the lowest setting.
We have put together a list of ways to dry paper mache fast:
- Use a hair dryer to speed up the drying process.
- Put your paper mache creations in the oven on the lowest setting to further dry them out.
- Let your paper mache creations sit in front of a fan or outside in the sun, which will help them dry faster and more evenly.
- Consider spraying your paper mache creations with a coat of shellac to help them dry more quickly and thoroughly.
Whichever method you choose, it is important to be patient when working with paper mache.
This material takes time to set and can often take days or even weeks to fully dry out.
However, with these tips, you can make sure that your creations are ready for use as soon as possible.
Drying paper mache in an oven
When drying paper mache in an oven, it is important to make sure that the oven is set to the correct temperature. If the oven is set too high, the paper mache will burn.
If the oven is set too low, the paper mache will not dry properly.
It is also important to keep an eye on the paper mache while it is drying in the oven. If it starts to brown, it is probably getting too hot and should be removed from the oven immediately.
When drying paper mache in the oven it is important to pay careful attention to the conditions, and to make sure that the paper mache is completely dry before removing it from the oven.
Drying paper mache in an oven can be a bit of a tricky process, but with careful attention to temperature and timing, you can successfully dry your paper mache pieces without any problems.
Whether you are drying small or large pieces of paper mache, it is important to carefully monitor the oven temperature and keep an eye on your drying piece at all times.
If you notice signs of burning or browning, it is best to remove the piece from the oven immediately and continue drying at a lower temperature until the piece is completely dry.
With these tips in mind, you can successfully dry your paper mache pieces in an oven.
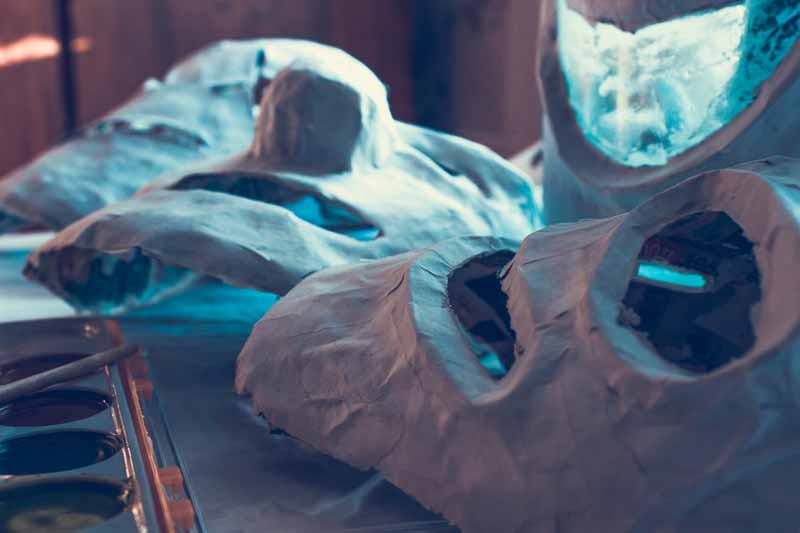
What is paper mache and what are some of its benefits
Paper mache is an art form that has been used for centuries. It is made by combining paper strips with a glue-like substance.
The most common glue-like substances are made from flour and water. When it is dry, the paper mache can be painted or decorated in many ways.
One of the benefits of paper mache is that it can be recycled. Paper mache products can be reused or turned into new products. Another benefit is that it is a very lightweight material so it can be used to create large products or structures.
Overall, paper mache is a great art form that offers many creative possibilities. Whether you are looking for a fun craft project or an interesting home decoration, it is sure to be a great choice!
Paper mache has been used for centuries as a popular art form due to its versatility and ease of use. It can be made from simple ingredients like flour and water, and once dry, it can be painted or decorated in many different ways.
Some of the key benefits of paper mache include its recyclability and lightweight nature, which makes it suitable for creating large products or structures.
Paper mache is a fun and creative way to express your artistic abilities, whether you are looking for a unique craft project or decorating your home. It is sure to be a hit with everyone.
How to make a basic paper mache mixture
To make a basic paper mache mixture, you will need: 1 cup of flour, 1/2 cup of water and 2 tablespoons of white school glue.
In a bowl, mix together the flour, water and glue until it forms a thick paste. You can then start coating your object with the paste.
Make sure the object is completely covered, then let it dry for several days. Once it is dry, you can paint it however you like.
It is a good idea to try out your mixture on a spare object before applying it to your actual project.
This will help you ensure that the mixture is the right consistency and that it coats the object evenly.
If you want to add extra strength, you can try adding 1 teaspoon of salt and 1 tablespoon of vinegar to the basic paper mache mixture. Just be sure to mix everything thoroughly before using it.
Whether you are making toys or decorative items, paper mache is a great way to create unique objects at home. With just a few simple ingredients, you can easily make your own paper mache mixture and start creating.
Tips for preventing paper mache from cracking or warping as it dries
When it comes to crafting, paper mache is one of the most versatile and forgiving mediums around.
It’s simple to make, and with a little practice you can create some truly amazing pieces.
The only downside to working with paper mache is that it can be prone to cracking or warping as it dries.
Here are a few tips for preventing that from happening.
- 1) Make sure your paste is thick enough. If it’s too thin, your piece will dry too quickly and will be more prone to cracking or warping. A good rule of thumb is to make your paste the consistency of toothpaste.
- 2) Use a blow dryer to speed up the drying process. Again, if your piece dries too quickly, it will be more likely to crack or warp.
- 3) Let your piece dry slowly and evenly. To do this, set it on a clean cloth in a warm, dry room where air can circulate freely around it.
- 4) Coat the finished piece with a protective sealant once it has dried completely. This will help to prevent cracking, warping, and moisture damage over time.
With these tips, you should be able to create beautiful paper mache pieces that are free of cracks and warps for years to come.
You could also try these tips:
- Experiment with different types of paper to see which works best for you. Some papers are more absorbent than others, and this can affect how quickly your piece dries.
- Use a protective barrier like plaster or shellac between the layers of your mache. This will help prevent warping as the layers dry.
- If possible, work in an area that is well ventilated and has low humidity. This will allow your pieces to dry slowly and evenly without developing any moisture-related issues.
Whatever tips you decide to try, just remember that practice makes perfect.
Additional ideas for using dried paper mache projects
There are many different ways that you can use dried paper mache projects. You can use them to decorate your home, to create new and innovative art pieces, or even to make new and exciting toys for your children.
If you are looking for a fun and creative way to spend your time, then dried paper mache projects may be the perfect solution for you.
- Decorating Your Home: One of the best ways to use dried paper mache projects is to decorate your home with them. You can hang them on the walls, put them on shelves, or display them in any other way that you please. By using dried paper mache projects as decorations, you can add a touch of personality and creativity to your home.
- Creating Art Pieces: Another great way to use dried paper mache projects is to create new and innovative art pieces. You can use them to sculpt new and exciting shapes, or you can even use them to paint pictures. The sky is the limit when it comes to creating art with dried paper mache projects.
- Making Toys: If you have children, then you may want to consider using dried paper mache projects to make new and exciting toys for them. You can use them to create dolls, cars, or any other type of toy that you can imagine. By using dried paper mache projects as toys, you can give your children hours of fun and enjoyment.
- Other Uses: There are many other uses for dried paper mache projects. You can use them to make jewelry, to create new and exciting hats, or even to make new and exciting furniture. The possibilities are endless when it comes to using dried paper mache projects.
No matter what you want to use dried paper mache projects for, you are sure to find a use for them.
They are a versatile and fun material that can be used in a variety of different ways. So don’t hesitate to get started on your next project today.
Who knows, you may just come up with the next great idea.
