Making clay pots without a wheel is an age-old tradition that still has its place in the modern world.
There are many ways to make a pot without a wheel, but for now we will focus on two methods:
The coil method and the slab method.
Each has its own advantages and disadvantages, so it’s important to choose the right one for your project. Let’s take a look at each of them.
The coil method is probably the easiest way to make a clay pot without a wheel. It’s also the most versatile, since you can make a wide variety of shapes and sizes with this method.
Basically, you roll out a long strip of clay and then shape it into a coil. Once you have your coil, you can then start shaping it into a pot.
This method is great for beginners, since it’s relatively easy to get the hang of.
The disadvantages of the coil method are that it can be difficult to get a smooth finish on your pots, and they tend to be a bit weaker than pots made with other methods.
However, if you’re just starting out, the coil method is definitely worth trying.
The slab method is a bit more difficult than the coil method, but it’s still relatively easy to do. With this method, you start by rolling out a flat sheet of clay.
Once you have your sheet, you then cut it into strips and shape them into coils. After you have your coils, you can then start shaping them into a pot.
This method is great for making larger pots, and it’s also relatively easy to get a smooth finish with this method.
The disadvantages of the slab method are that it can be time-consuming, and it’s not as versatile as the coil method.
However, if you’re looking to make large pots or want a smoother finish, the slab method is definitely worth trying.
So, which method should you use to make your clay pots? It really depends on your project.
If you’re just starting out, the coil method is probably the best way to go. If you’re looking to make larger pots or want a smoother finish, the slab method is definitely worth trying.
Table of Contents
Fun ways to use your handmade clay pots?
Handmade clay pots can be used for a variety of purposes, from holding flowers to cooking food.
Here are five fun ways to use your handmade clay pots.
- Make a mini herb garden. Perfect for small spaces, a mini herb garden in a clay pot can add a touch of greenery to any room. Simply fill the pot with soil and plant your favorite herbs.
- Create a succulent arrangement. Succulents are perfect for those who want to add some green to their home but don’t have a lot of space or time for gardening. Arrange a few succulents in a clay pot and place it on a windowsill or shelf.
- Plant flowers. Fill your clay pot with soil and plant your favorite flowers. Water regularly and enjoy watching them grow!
- Use it as a vase. A handmade clay pot makes a unique and beautiful vase. Simply fill it with water and add your favorite flowers.
- Cook with it. Clay pots can be used for cooking, either on the stovetop or in the oven. Be sure to soak the pot in water for 30 minutes before cooking to prevent it from cracking. When cooked properly, food cooked in a clay pot has a unique and delicious flavor.
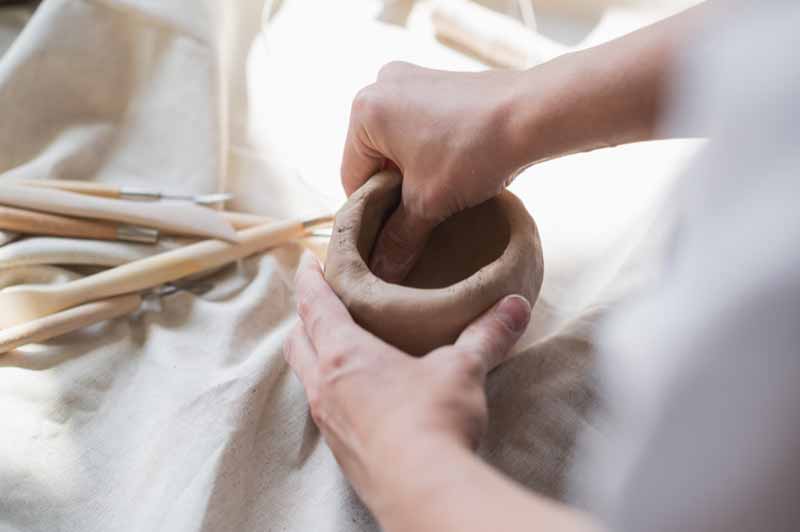
How to make a simple clay pot without a wheel
Making a clay pot is an ancient art form that can be traced back to the Egyptians. But what if you don’t have a wheel? You can still make a simple clay pot using just your hands and some simple tools.
- Start by gathering some clay from the earth. It should be soft and malleable, so that it can be molded easily. If the clay is too dry, add a small amount of water until it is pliable.
- Form the clay into a ball, then press it down flat to create a disc shape.
- Use your fingers to press evenly around the edge of the disc, creating a raised lip on the circumference. This will form the base of your pot.
- Now use your thumbs to create an indentation in the center of the disc, making sure that it’s deep enough to hold water without spilling over the sides.
- Finally, use your fingers to smooth out any bumps or irregularities on the surface of your pot.
Let it dry completely before using it for its intended purpose.
How to make a clay pot using a mold
Making a clay pot is a fun and easy project that can be completed with a few simple supplies. In addition, using a mold to create the shape of the pot makes the process even easier. Here we will show you how to make a clay pot using a mold.
- 1) Begin by gathering your supplies. You will need some clay, water, a bowl or container for mixing the clay, and a mold for shaping the pot. The type of mold you use is up to you, but it is best if it is made out of rigid material such as cardboard or plastic.
- 2) Next, prepare the clay by kneading it until it is soft and pliable. If needed, add water sparingly until the desired consistency is reached.
- 3) Now place the clay in the bowl or container and mix in enough water so that it becomes wet all over.
- 4) Remove the clay from the bowl and begin shaping it into a ball. This can be done by hand or with a rolling pin if desired.
- 5) Place the ball of clay inside of your chosen mold and press down firmly. Make sure all areas of the clay are in contact with the mold before moving on to step 6).
- 6) Use a blunt object such as a popsicle stick or the handle of a spoon to press evenly into the clay, working from the center outward. This will help to create an even thickness all around the pot.
- 7) Once you are satisfied with the shape of your pot, use a knife or other sharp object to make a hole in the bottom. This hole will be used for drainage when the pot is complete.
- 8) Finally, remove the pot from the mold and set it aside to dry. Once it is dry, it can be painted or decorated as desired. Be sure to place it in a well-ventilated area so that it can dry completely.
Now that you know how to make a clay pot using a mold, try it out for yourself! This is a great project for both kids and adults alike.
And once you get the hang of it, you can experiment with different molds to create all sorts of different shapes and sizes of pots.
How to make a textured clay pot without a wheel
Making a textured clay pot without a wheel is an art form. There are many ways to go about it, and each potter has their own method that they prefer.
In this tutorial, we will explore two methods of texturing clay pots using a stamp and using a texture tool. Let’s get started.
Method 1: Using a Stamp
The first method is to use a stamp. This can be done by either carving your own design into a piece of rubber or foam, or by using a store-bought stamp.
If you are using a store-bought stamp, make sure that it is clean and free of any debris. Dip the stamp into some water and then press it onto the clay.
You can also add slip (clay mixed with water) to the back of the stamp before pressing it onto the clay pot. This will help to prevent the stamp from sticking.
Once you have stamped your design onto the pot, you can either leave it as is or paint over it with a glaze or slip.
Method 2: Using a Texture Tool
The second method is to use a texture tool. This can be anything from a fork to a piece of cardboard. Simply press the tool into the clay and twist or turn it to create your desired design.
As with the stamping method, you can either leave the pot as is or paint over it with a glaze or slip.
There you have it- two methods for texturing clay pots without a wheel. Get creative and see what designs you can come up with.
How to make a glazed clay pot without a pottery wheel
Making a clay pot is a fun and rewarding experience, but it can be difficult to do without the proper tools.
One of the most important tools for making pots is a pottery wheel, which allows you to spin the clay around so that it takes on a cylindrical shape.
However, if you don’t have access to a pottery wheel, there are still ways you can make a beautiful clay pot. Let’s explore how to make a glazed clay pot without using a pottery wheel.
The first step is to gather your materials. You will need a piece of wet clay, a pottery knife, and a kiln.
If you don’t have access to a kiln, you can try using a hair dryer on its highest setting or bake the clay in an oven set to its lowest temperature.
Next, use your pottery knife to carve out the shape of your pot.
Start with a basic cylinder shape and then use your knife to carve out any details you want, such as a lip on the top of the pot or handles on the sides.
Once you’re happy with the shape of your pot, it’s time to start glazing it. First, brush on a layer of clear glaze all over the pot.
This will help the color glazes adhere to the clay better.
Then, start adding your color glazes. You can either brush them on or use a sponge to dab them on.
Experiment with different colors and techniques until you find a look you love.
Finally, fire your pot in the kiln or oven to set the glazes. Once it’s cooled, your pot is ready to use.
