It can be hard to come up with new ideas for your jewelry, especially if you want to switch things up from the traditional look.
Beads are a great way to change up your style, but it can be hard to find new designs that are both stylish and unique.
Check out our top 10 clay bead bracelet ideas:
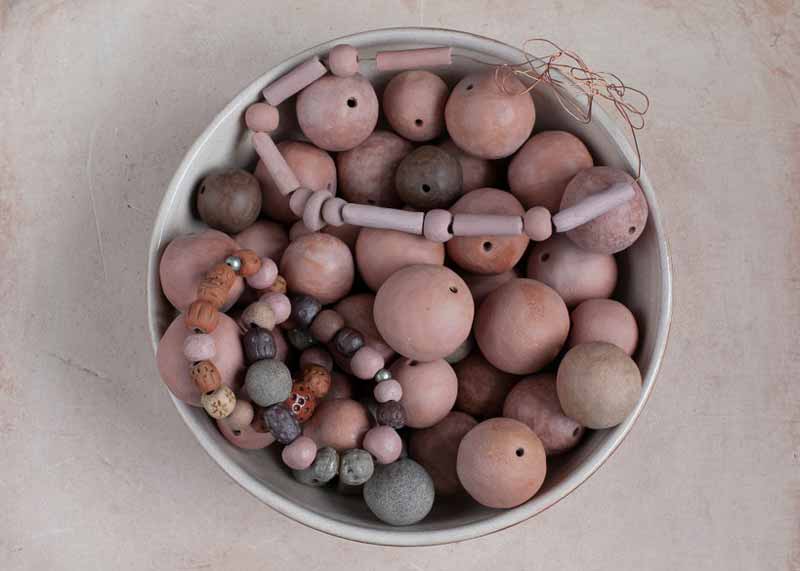
- 1. A simple beaded bracelet made with clay beads in earthy tones.
- 2. A funky and colorful beaded bracelet with a mix of different shapes and sizes of clay beads.
- 3. A delicate beaded bracelet with small clay beads in muted colors.
- 4. A boho-inspired beaded bracelet with large clay beads and charms.
- 5. A chic and sophisticated beaded bracelet made with black clay beads.
- 6. A whimsical and fun beaded bracelet made with brightly colored clay beads.
- 7. An elegant beaded bracelet made with white clay beads and pearls.
- 8. A rustic beaded bracelet made with natural clay beads.
- 9. A playful beaded bracelet made with brightly colored clay beads and unique shapes.
- 10. An eye-catching beaded bracelet made with a mix of clay beads in different colors and sizes.
Which of these clay bead bracelet ideas is your favorite? Let us know and read on for more fantastic ideas.
Table of Contents
How to make a clay bead bracelet
Clay bead bracelets are a popular craft project. You will need some air-dry clay, a bracelet mold, paint and a sealer.
- Begin by mixing your clay according to the directions on the package.
- Next, press the clay into the bracelet mold until it is fully covered. Use a blunt object like a pencil to smooth out any bumps or cracks in the clay.
- Once your bracelet has fully dried, you can begin painting it with acrylic paint. Choose a color scheme that suits your style and let the paint dry fully before applying a sealant.
- Be sure to apply multiple coats of sealant so that your bracelet will be protected from everyday wear and tear. You can apply another layer of sealant when the first one has dried.
- Finally, you can attach a charm or other decorations to your bracelet using jump rings and jewelry pliers.
- Enjoy your new clay bead bracelet!
Making a clay bead bracelet is a fun and simple craft project that anyone can do. With just a few supplies, you can create a unique and stylish bracelet that you’ll love to wear.
So what are you waiting for? Get creative and start making your own clay bead bracelet today.
Polymer clay bead bracelets
Polymer clay bead bracelets are a fun and easy way to show your personality. You can make them in any color, style, or design you want. They are also very affordable, making them a great option for people on a budget.
Polymer clay is a type of modeling clay that can be used to create all sorts of crafts and jewelry. It comes in many different colors, so you can create any design you like. One of the most popular projects using polymer clay is bead bracelets.
Bead bracelets are very simple to make. All you need is some polymer clay, a bracelet mold (or you can use an old bracelet as a mold), and a baking sheet.
First, roll out a piece of clay into a long strip that is the same width as your mold. Use this strip to create several small beads by pressing them into the mold.
After you’ve made all the beads you need, place them on a baking sheet and bake according to the instructions on the package.
Once they are baked and cooled, attach your beads to your bracelet using jewelry glue or superglue. Finally, add any finishing touches such as a clasp or charm, and you’re done!
If you want to make your bead bracelets even more unique, consider adding other elements like charms or crystals to create an eye-catching design.
You can also experiment with creating different shapes for your beads, such as hearts or stars. The possibilities are endless! So have fun and get creative with your bead bracelet designs.
Preppy clay bead bracelet ideas
Most people think of bracelets as something that is strictly for preps. While there are a lot of preppy clay bead bracelet ideas out there, this does not mean that other styles cannot be just as stylish.
In fact, by using your own creativity, you can come up with some amazing designs that will set you apart from the rest.
The Basics: When it comes to bracelets, there are a few basic things you need to know before getting started.
First, decide what type of bracelet you want to make. There are many different types, including string bracelets, link bracelets, and charm bracelets.
Once you have decided on the type of bracelet you want to make, gather the necessary supplies. This includes beads, charms, clasps, and any other materials you will need.
If you are making a string bracelet, you will also need a beading needle and thread.
Now that you have the basics down, it is time to start brainstorming some design ideas. The following are just a few preppy clay bead bracelet ideas to get you started.
- Use different colors of clay beads to create a striped effect.
- String the beads on wire instead of thread for a more polished look.
- Incorporate pearls or other gemstones into your design for added elegance.
- Create patterns or shapes with the beads by stringing them in a certain order.
- Make your bracelet adjustable by adding an extender chain to the clasp.
- Add charms or pendants to personalize your bracelet.
- Use multiple strands of thread or wire to create a thicker bracelet.
- Braid the threads or wires together for a unique twist on the basic bracelet.
- Wrap the beads around a wide ribbon or strip of fabric for a different look.
- Get creative and come up with your own preppy clay bead bracelet ideas.
This is how you make a preppy clay bead bracelet.
How to make polymer clay disc beads
Polymer clay disc beads are a popular craft project. You can make them in a variety of colors and shapes, and they are easy to make.
To make polymer clay disc beads, you will need:
- Polymer clay in different colors (at least two)
- A rolling pin
- A sharp knife
- A circle template, such as a lid from a jar or a CD case
- Bakeable jewelry findings such as ear wires, head pins, and jump rings
- Optional: Glaze or sealant (for a shiny finish)
Now you’re ready to get started.
- Start by conditioning your clay. This means working it until it is soft and pliable. You can do this with your hands, or use a clay conditioning machine if you have one.
- Once the clay is conditioned, roll it out into a thin sheet using a rolling pin. The thinner the sheet, the more delicate your beads will be.
- Use the circle template to cut out discs from the clay sheet. If you want to make multiple colors of beads, make sure to keep each color separate.
- Make a small hole in the center of each disc using a sharp knife. This hole should be big enough to fit the jewelry finding through later.
- Bake the discs according to the package directions for your clay.
- Once they are cooled, you can add a glaze or sealant if desired. Then, string the beads onto the jewelry finding of your choice.
- Wear your new beads with pride!
Disc beads are a great way to show off your polymer clay skills. With just a few supplies and some time, you can make beautiful beads in any color combination you can imagine. So have fun and get creative.
Clay beads for jewelry making
Making your own jewelry is a fun and rewarding hobby. Not only do you get to create something unique, but you can also save money by making your own beads from clay. In this tutorial, we will show you how to make simple beads from clay that can be used for jewelry making.
Preheat the oven to 275 degrees F (135 degrees C). Take a lump of clay and roll it into a thin snake shape. Cut the snake into small pieces, each about 1/2 inch (1 cm) long. Make a hole in the center of each piece with a toothpick or needle.
Bake the clay pieces in the oven for 15 minutes. Remove them from the oven and let them cool. Once they are cool, you can decorate them however you want with paint or varnish.
Now that your beads are ready, you can use them to make beautiful jewelry. You can string the beads together into necklaces, bracelets, and more. Get creative and have fun!
We hope you enjoyed this tutorial on how to make clay beads for jewelry making. If you like making unique jewelry pieces from scratch, be sure to check out our other tutorials for more tips and tricks. Have fun crafting!
Get inspired by nature
Making a clay bead bracelet is a fun and easy way to get inspired by nature. You can use any kind of clay, but I like to use air-dry clays because they are easy to work with and don’t require any baking.
Just make sure you seal the finished bracelet with a coat or two of varnish, so it will be water resistant.
First, gather some supplies. You’ll need some type of clay (I prefer air dry), a rolling pin, beads in different shapes and sizes, string or cord, scissors, and a sharp knife.
Air dry clays come in many colors and textures, so choose the ones that appeal to you most. If you want to add extra color to your bracelet, you can apply paint or add other decorations like glitter.
To make the bracelet beads, roll out a piece of clay on a flat surface. Use your rolling pin and cutters to form the beads into whatever shapes you like.
I usually make mine in simple circles or ovals. Be sure to keep them thick enough so they don’t break when you string them onto the cord later – about 1/4 inch should be good.
Once you have all your beads shaped, let them dry for at least 24 hours (clay will dry faster if it is left uncovered). Then arrange them in any pattern that appeals to you on a length of string or cord.
When you are happy with the pattern, tie the ends of the string together and trim off any excess.
To finish, apply a layer or two of sealant to your bracelet. This will help protect it from water damage and keep the colors vibrant.
Choose your colors and beads wisely
Making a clay bead bracelet is a fun and easy way to add some personality to your style.
But before you get started, there are a few things you need to know. First, choose your colors and beads wisely. You want something that will reflect your personal style, but also something that will be durable and last long.
Next, make sure you have the right tools for the job. You’ll need some pliers, wire cutters, and a bowl of water to keep your hands wet. This will help keep the clay from sticking to your fingers.
Now it’s time to start making some beads! Roll out a small ball of clay in your hands, then press it into a disc shape with your thumbs. Use the wire cutters to make a small hole in the center of the disc, then thread it onto the wire.
Repeat this process until you have enough beads for your bracelet. Then, carefully bend the wire into a circle and secure the ends together.
Now all that’s left to do is enjoy your new bracelet.
Use different types of clays for added texture
You can use different types of clays for added texture, and you can even experiment with different colors and shapes. The possibilities are endless, so let your imagination run wild.
First, choose the colors of clay that you want to use. You can mix and match as much as you like, or stick with one color scheme. It’s entirely up to you!
Next, roll out each color of clay into a thin sheet. Be sure to keep them all the same thickness, so they will bake evenly.
Now it’s time to start creating the beads. Take one sheet of clay and begin cutting out small circles. You can use a cookie cutter, or just cut them out by hand.
Once you have your circles, it’s time to start rolling them into beads. Start at the center of the circle and roll it up into a ball. Be sure to roll it between your palms until it’s nice and round.
Now that all of your beads are made, it’s time to bake them. Preheat your oven to the temperature specified on the clay package, and then bake the beads for the recommended amount of time.
Once they’re finished baking, let them cool completely before handling.
Now it’s time to start stringing your beads. You can use a needle and thread, or an elastic band. Just be sure to tie the ends together so that the beads don’t slip off.
Finally, you should finish your bracelet with any embellishments you like. This could include glitter, paint, rhinestones – anything that takes your fancy!
With these simple steps, you can create beautiful clay bead bracelets that are perfect for yourself or as gifts for friends and family. So have fun experimenting and creating unique pieces using this easy technique.
As you can see, there are endless possibilities when it comes to making clay bead bracelets. Whether you love bright colors or earthy tones, whether you prefer geometric shapes or organic designs – there’s something for everyone. So get creating and have fun with this easy craft!
And don’t forget – you can also experiment with different types of clays, as well as adding other embellishments to your final product. The sky really is the limit when it comes to creating unique clay bead bracelets, so use your imagination and see what you can come up with.
Polish your bracelet for a finished look
Not only are clay bead bracelets modern and stylish, but they’re also very versatile. You can wear them with almost any outfit, for any occasion. Plus, since they’re so easy to make, you can customize them however you want.
If you have followed some of the steps above to make a bracelet, all that’s left to do is for you to polish it for a more refined finished look.
To do this, all you need to do is take a soft rag and rub the bracelet down with it. This will remove any dust or smudges that may be on your bracelet, creating a much sleeker and shinier appearance.
Not only are clay bead bracelets great for adding an on-trend touch to your outfit, but they’re also super versatile.
You can wear these bracelets with almost any outfit, from dresses to jeans and tees. Plus, since they’re so easy to make yourself at home, you can customize them however you want.
Whether you prefer bright colors or simple neutrals, there are plenty of options when it comes to making clay bead bracelets.
So if you’re looking for a fun and unique jewelry project to try, be sure to give clay bead bracelets a try.
